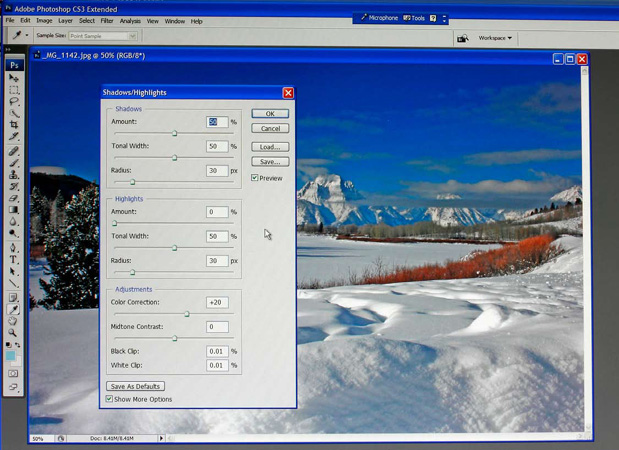
Shadow/Highlight
This is my first Photoshop adjustment after my image has been properly cropped. This command brings out the details lost in the shadows and in the overexposed areas. It quickly exposes and brightens the details hidden in the shadows and washed out areas. It will amaze you with the amount of hidden details that are suddenly exposed.
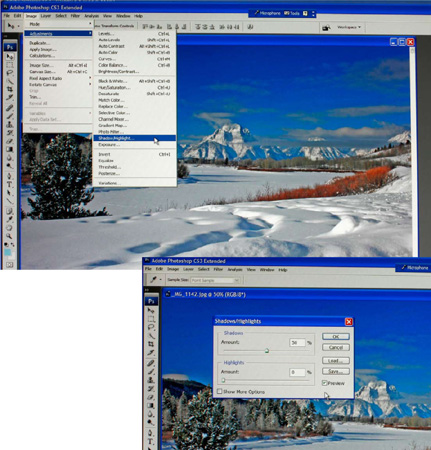
Image > Adjustments > Shadow/Highlight
This command can give you precise control with a multitude of sliders by clicking on the show more options command. This brings up three sliders each for shadows and highlights and two sliders for adjustments and a black and white slip box. The shadows and highlight sliders control the amount, tonal width and radius. The adjustment sliders control color correction and mid tone contrast.
Shadow tonal width allows you to precisely adjust only the darkest shadow areas. Increasing this slider affects a wider range of shadows. Increase it too much and it starts to change the mid tones.
The radius amount determines how many pixels each adjustment affects. This affects a wider range of pixels.
The highlight tonal width and radius works similarly.
The color correction slider is used to reduce the saturation caused by overly using the shadow or highlight adjustments. Sometimes these last two adjustments can cause the colors to be overly saturated.
The mid tone contrast slider increases or decreases the contrast in the mid tone ranges.