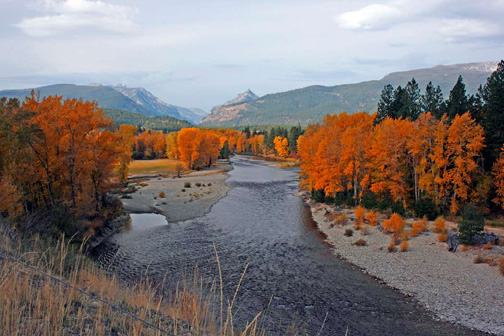
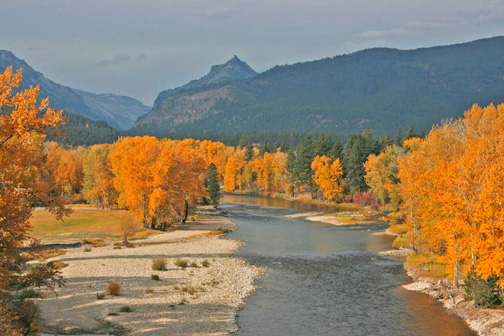
Photoshop Transformation of Photo 2
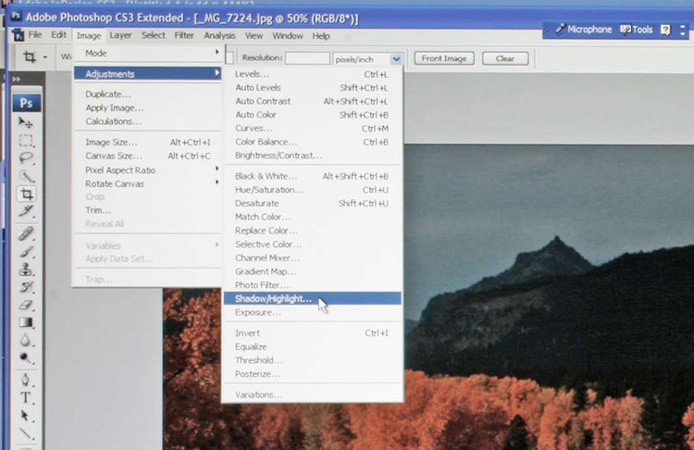
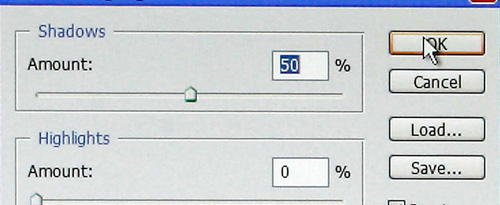
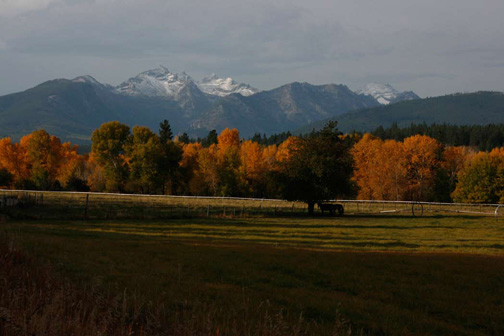
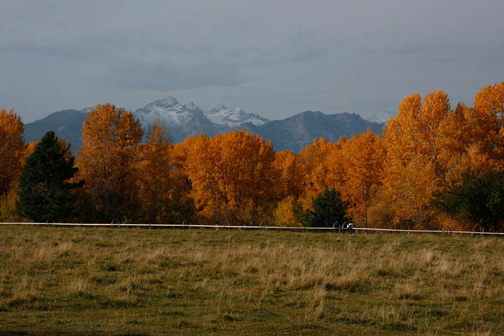
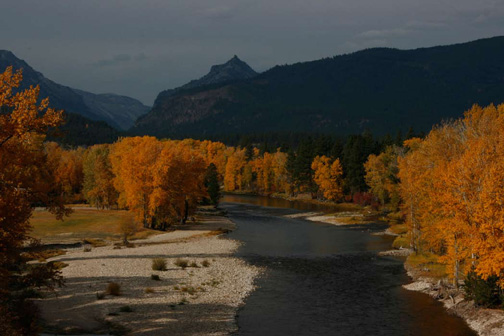
The first thing I want to do is to eliminate the dark shadows. For this process I use the Shadow/Highlight command.
Choose Image > Adjustments > Shadow/Highlight
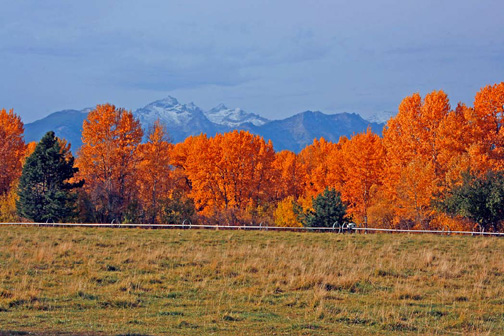
I use a 50 % preset on the shadow scale and click OK. This brightens the areas of shadows and now you can see the details that were once obscure. It also brings life to the colorful leaves. This command has infinite adjustments on its two slider bars. By adjusting these you can customize the shadows and the highlights. But I find that the 50 % preset works well most of the time.

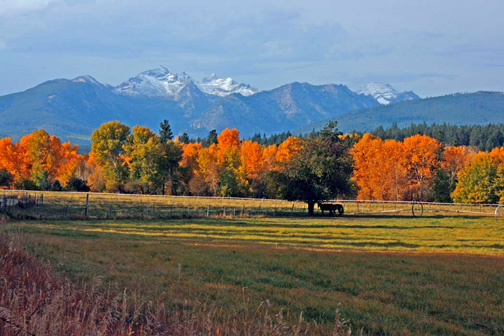
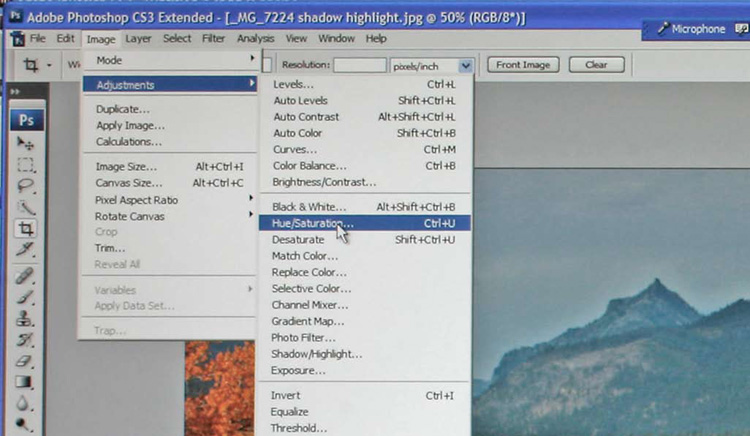
Next I want to saturate the colors that were hidden in the shadows. I do this by using the Hue/Saturation command.
Choose Image > Adjustments > Hue/Saturation
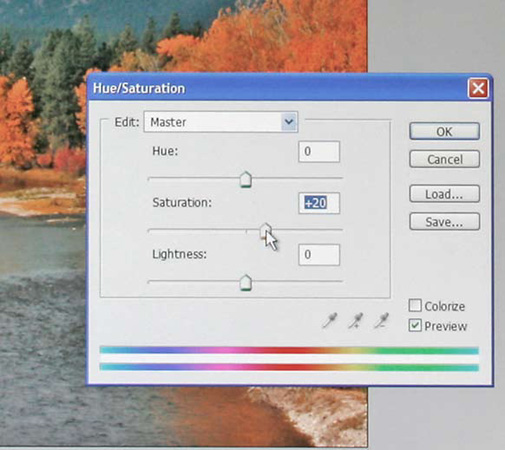
I’m reluctant to change the color’s hue; I just want to enhance the original colors. So I only use the Saturation Command. I will use only the Saturation slider. Usually an increase of 5 to 20 % is adequate. Here I selected a 20 % increase and click OK since I want to sharply contrast the bright yellow leaves with the darker surroundings.
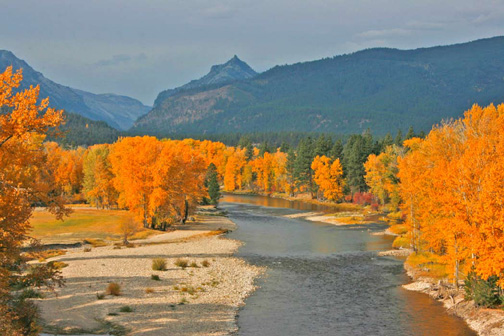
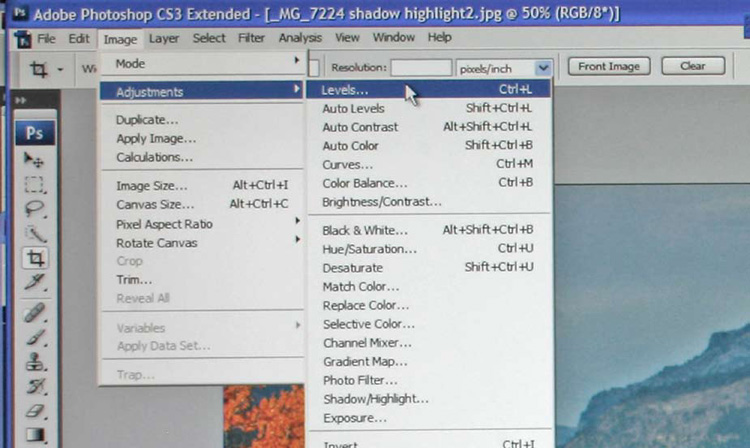
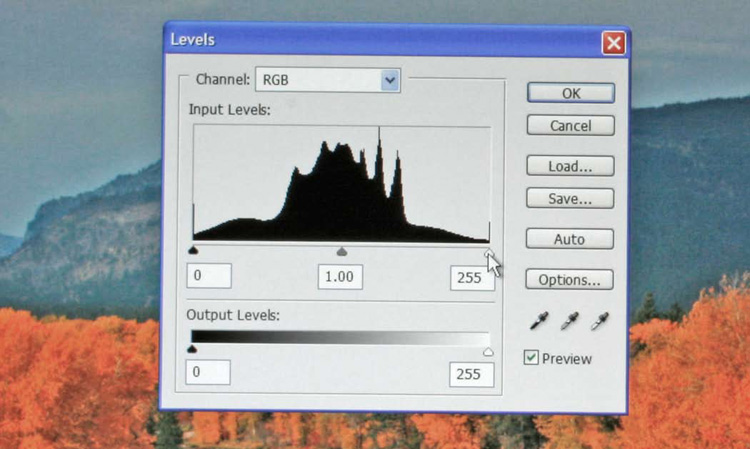
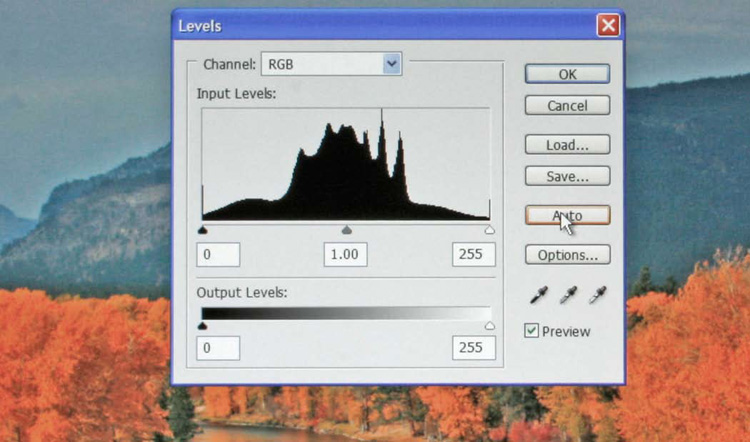
My next step is to correct the image color and tone. Most of the time I use the Levels Command to correct the tonal range and color balance.
Choose Image > Adjustments > Levels
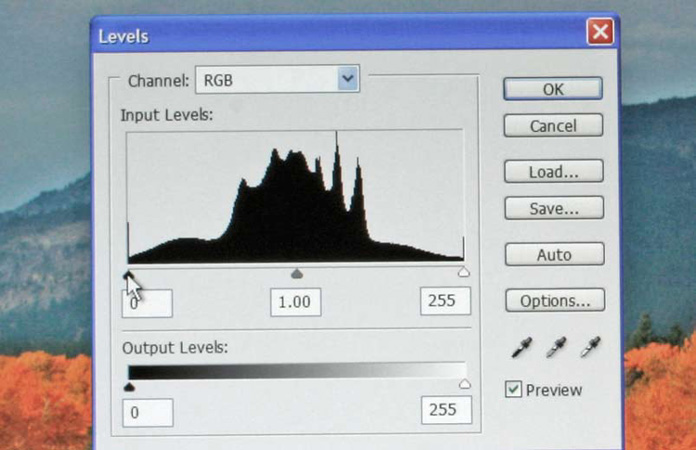
I correct the tonal range by moving the shadows slider which is the black cone to just where the black histogram graph starts to rise from the baseline. Next I move the Highlights white cone to where the far right side of the histogram graph meets the baseline. This automatically moves the mid tones gray cone to the desired position. This redistribution increases the tonal range of the image. In doing so it also increases the overall contrast of the image.

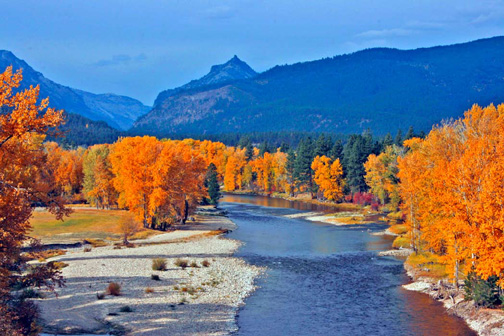
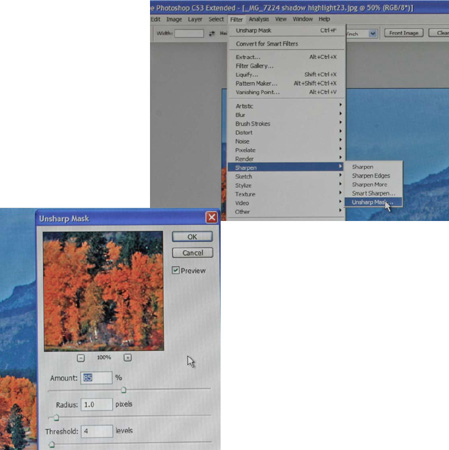
Finally I like to apply an unsharp mask. With all of the previous steps sometimes a little sharpness is lost. I use a preset of 85 amounts, 1 radius, and 4 thresholds.
Choose Filter > Sharpen >Unsharp Mask
Over sharpening can produce a halo effect around the edges. This Unsharp Mask works by increasing the contrast along the edges in an image. My above preset values produce a subtle degree of sharpness without any haloing. Again I click OK to make the correction.